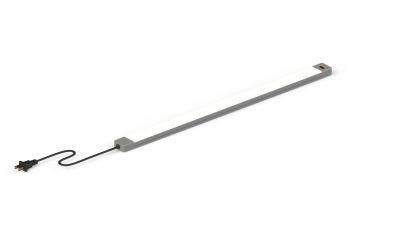
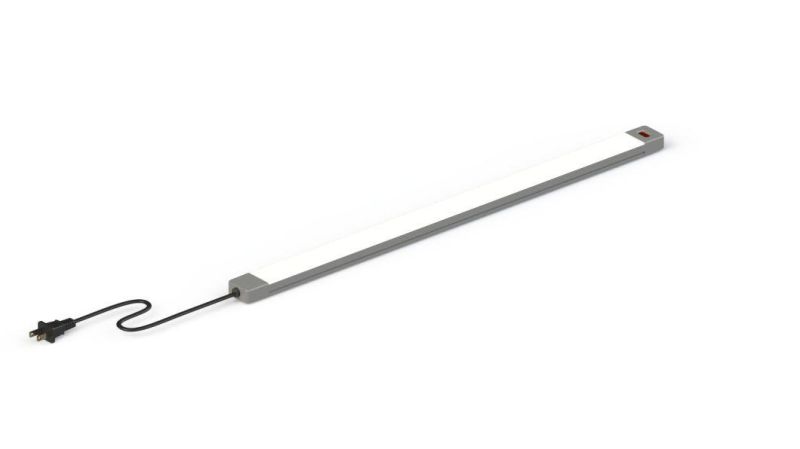
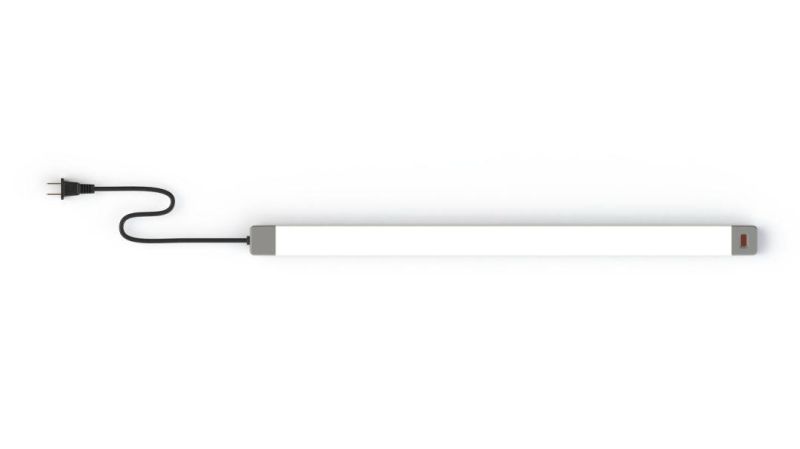
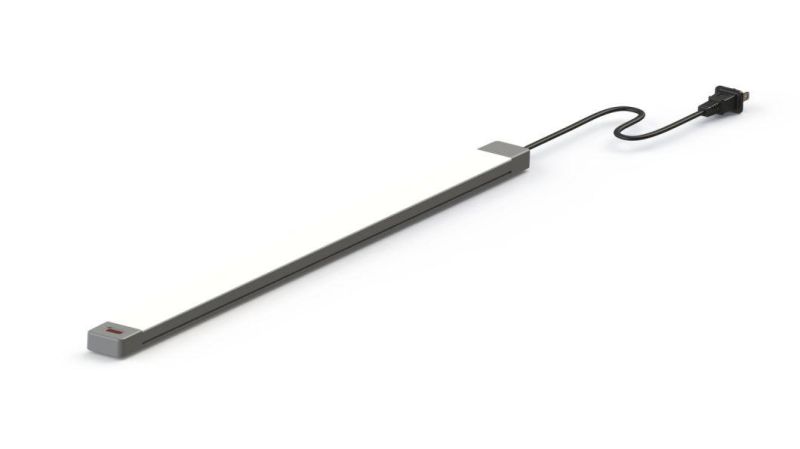
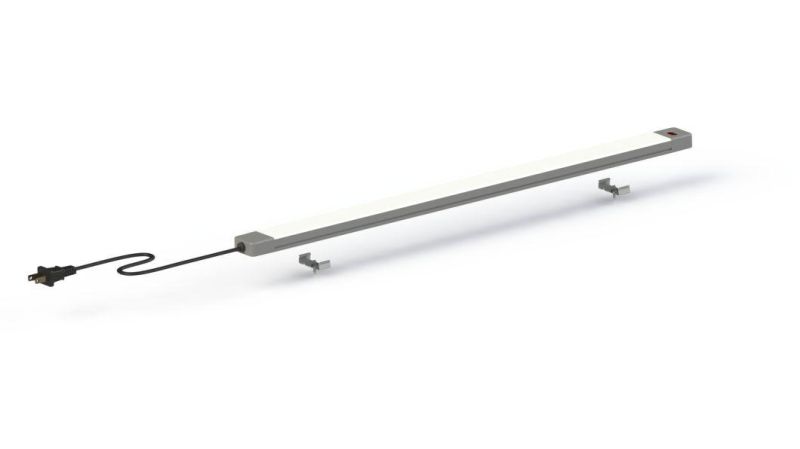
Cononlux AC Plug Handwave Sensor Kitchen Lights
Cononlux Technology Co., Ltd.- Power:9watts
- Color Temperature:3000kelvin-6000kelvin
- Emitting Color:Warm White,Cool White
- Installation Mode:3m Adhesive,Screw Installation
- Switch Type:Handwave Sensor
- IP Rating:IP44
Base Info
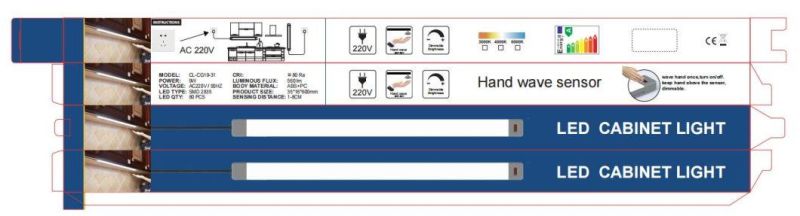
- Model NO.:CL-CG19-31
- Shade Direction:Up
- Input Voltage:AC110V,220V
- Shade Type:ABS+PC
- LED Chips Brand:Epistar
- Certification:FCC, UL, LVD, EMC, CE
- Luminous:600lm
- LED Type:SMD 2835
- LED Qty:80
- CRI:>80
- Dimming Range:8%-100%
- Transport Package:Color Box Package
- Specification:236*14*6 inch
- Trademark:Cononlux
- Origin:Shenzhen
- HS Code:9405409000
- Production Capacity:20000PCS , Month
Description
Overview
Product DescriptionModel Packaging & Shipping
1.Drill holes according to the screw hole size of the product (262mm), and install the fixing rubber plug (M3 fixing rubber plug)
2.Align the product and install the rubber plug in advance, and tighten it with M3 screw

2.Installation mode of double-sided tape
1.Tear off the core separation paper of the double-sided adhesive, and stick the double-sided adhesive on the back of the product (if there is dust on the back, wipe off the dust and then stick the double-sided adhesive)
2.Remove the other end of the double-sided adhesive tape from the core paper, and then stick it at the position to be pasted (dust shall be cleaned before pasting).

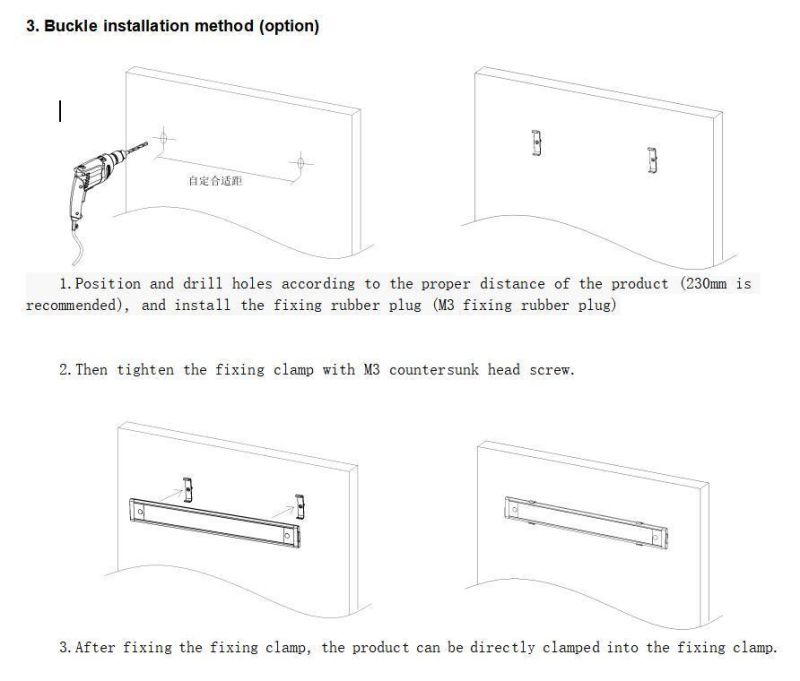
3. Buckle installation method (option)
1.Position and drill holes according to the proper distance of the product (230mm is recommended), and install the fixing rubber plug (M3 fixing rubber plug)
2.Then tighten the fixing clamp with M3 countersunk head screw
3.After fixing the fixing clamp, the product can be directly clamped into the fixing clamp
Detailed Photos
1.Screw installation mode
1.Drill holes according to the screw hole size of the product (262mm), and install the fixing rubber plug (M3 fixing rubber plug)
2.Align the product and install the rubber plug in advance, and tighten it with M3 screw
2.Installation mode of double-sided tape
1.Tear off the core separation paper of the double-sided adhesive, and stick the double-sided adhesive on the back of the product (if there is dust on the back, wipe off the dust and then stick the double-sided adhesive)
2.Remove the other end of the double-sided adhesive tape from the core paper, and then stick it at the position to be pasted (dust shall be cleaned before pasting).
3. Buckle installation method (option)
1.Position and drill holes according to the proper distance of the product (230mm is recommended), and install the fixing rubber plug (M3 fixing rubber plug)
2.Then tighten the fixing clamp with M3 countersunk head screw
3.After fixing the fixing clamp, the product can be directly clamped into the fixing clamp